 I know many students like using glitter in their photos (too many in my opinion). I sometimes have to sweep it up in the photo studio which often looks like an explosion in a glitter factory. Anyway, I came across the work of Australian artist Tanya Schultz who doesn't use glitter but something similar ...sand (with a hint of glitter) . Very colourful sand, with which she creates these eye popping installations under the rather cutesy name of 'Pip and Pop', the colours are amazing. She is very skilled at 'drawing' with it, making complex patterns. This sand is - I think - aimed at children but may have some photographic applications, I know you can get a wide range of DayGlo colours and they also do some amazing glow in the dark sand which may produce interesting photographs. I've put a slide show of her work below. One thing I like about her installations is that they're transient, once the exhibition is over they are effectively destroyed. You can see more of her work on her web site - http://www.pipandpop.com.au/  Recently when I was passing a skip, as you do, I saw what I thought was an interesting object, so I took it. Call me a weirdo if you like (I will ...weirdo! - Blog editor) but I think it's very sculptural (see image on left and below). It's made of the expanding foam which builders pump in between the brickwork to insulate a building. I'm guessing a builder was mucking around with foam he had left over. While researching this stuff on the internet I saw several artists using it and it's also used a lot in model making and in film/theater set design for making props and scenery, as you can carve it easily with a knife and sand it smooth when its dry. It's also very lightweight which is handy.  Nothing to do with Photography Now I know this post isn't strictly speaking about photography but foam is the sort of material you could use to make props or scenery for an installation that you're photographing. Say, for example, you wanted to use a giant sized apple in your photo-shoot, if you asked my opinion on how to make the apple I would recommend using expanding foam. You would then ignore my advice and use Photoshop to enlarge a photograph of an apple as it's the easier option. This is of course called 'cheating' and also you wouldn't get as many Brownie points off the teachers as you would for making a real 'fake' giant apple, if you see what I mean. Expanding foam would also be ideal if you wanted to make unpleasant 'growths' to stick onto your body to transform yourself into a toxic radioactive space mutant, for example. You might also want to spray it into an old pair of jeans, for no apparent reason, just to see what happens when they inflate and the foam oozes out of the holes in the legs. So you see it's a material that is full of possibilities! I've pasted a slide show below of random stuff I found on the web made using this foam, I particularly like the work of a sculptress called Charlotte Nash (see first 3 photos in slide show) who squirts foam into patterned tights, the foam oozes out of the pattern in interesting ways, her sculptures look like alien vegetables (space marrows? - Blog Editor). Here's a link to a Pinterest page with tons more ideas/examples using expanding foam - https://uk.pinterest.com/explore/expanding-foam/ Note: The foam can be bought fairly cheaply on eBay (for example) but needs to be used with some care as it's highly flammable, very sticky and gives off unpleasant fumes when it's in it's wet state, so you need to spray it in a well ventilated room, preferably outside. When it's dry it's much less unpleasant and relatively safe as far as I know.  Welcome back to Myton, this year there's a special emphasis on spelling which I fink is a gud ideer as I'm very gud at spelin wirds. Hope you had a good holiday and are feeling well. You may not be looking forward to the new school year, worry not as I know some staff aren't either including me, it's a bit of a culture shock after 6 weeks doing err... nothing or what you like or working hard at a summer job if you're industrious which I'm not. However, it could be a fun and challenging year ahead, although I'm not making any promises. I'm sure the teachers have been working hard over the holidays thinking of fun projects or not as the case may be. Anyway, I'm not selling the new school year very well but in this Blog you can expect mild excitement (due to Mr Lockwood's holiday photos), mild amusement -due to Mr Lockwood's jokey writing - (really? - Blog Editor) and mild educational enlightenment - due to facts and err... information, most of which will be accurate or not. Softening the blow Have you noticed someone has come up with the bright idea of turning emoticons into cushions? Which brings me to a tenuous link to photography as I've pasted a slide show below of some photo printed cushions and things. I like the weird Japanese(?) shrimp (or prawn) neck pillow, chicken drumstick cushion and the bacon blanket/duvet cover which would make me feel slightly nauseous if I had that on my bed. They're surprisingly and unpleasantly lifelike, you could try getting some of your own work printed on cushions as I know there are printing services that do this, how you'd work it into a project I have no idea. 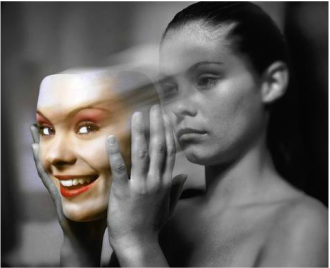 And so as another school year draws to it's conclusion we leave Myton School in historic Warwick, birthplace of Shakespeare and where he may have visited at least once. We have mixed feelings - happy that the holidays are coming and sad that we are leaving this haven of supportive learning, but mostly we feel relief that we no longer have to work (or at least I do! [I agree! - Blog Editor]). Therefore I will bid you farewell or as the French say 'Oh rev wah' or 'A bee Ann tot' which I believe roughly translates as 'I would like that piece of cheese!' and 'I'm going for a long sleep'. I plan to sleep for about half the holiday or possibly longer.
I may do some photography, I may not, I may visit an art exhibition, I may not, I may pig out on a slap up meal at Nandos, I may not... (goodbye Mr Lockwood it's been a pleasure editing this Blog .....not! Until September! - Blog Editor) No, not that type of sw/nger! It's a new app by Polaroid called Sw/ng which is quite clever, it creates a picture that moves when you move your mouse cursor. I haven't figured out how to embed the sw/ng pictures into Weebly pages so you'll just have to follow this link https://polaroidswing.com/p/a0fb8ec0-486b-11e6-a32b-c2bfd1775128
The 'press' tab on the web site has multiple examples of images done with this app, you can also download the app from the site, not sure what phones are supported.  I asked my good friend Major Hubert Forberry-Thistledown (ret'd) to write a short piece about his experiences as a wildlife photographer. I met Hubert when I served in his regiment during the Korean war. He led the disastrous invasion of the island of St. Michelle, disastrous because the island is 1,000 miles from Korea, in the middle of the Pacific ocean. The Major blamed inaccurate maps but I suspect his compass was faulty. St. Michelle is an uninhabited volcanic island with little vegetation or animals and after 3 months stranded on the island we were forced to resort to eating each other, tragically only myself and the Major survived. I'm not very proud of this episode but it was every man for himself, preferably roasted over an open fire and seasoned with wild garlic, yummy! Myself and the Major eventually escaped by sailing across the pacific ocean using the blown up skins of the men we'd eaten to make an inflatable life raft, this may sound horrific but it gave us something to chew on if we felt peckish during the extremely long voyage.  Shooting Wildlife (with cameras) by Major Hubert Forberry-Thistledown (ret'd) What!?.... eh!... yes... err... mushrooms!... mmmmnnnyyyhhhh! Right! wildlife photography!... yes... exactly! Been shooting animals for a long time, first with a Purdey 12 bore then with a camera. Banned from using a gun sadly, long story short, illegal poaching, endangered species, prison, escaped, shot a man (acquitted) etc.. Now I use a camera to 'shoot' the fauna... what!, I'm good at creeping up on animals, army training sneaking up on things, transferable skills! I do a lot of photography lectures with titles such as - Animals I have shot in Africa, Animals I have shot in Europe, Animals I have shot in South America etc. you get the idea. Therefore I thought for this article I'd write the answers to the questions I most often get asked at the end of my lectures.  First question - What is the hardest animal to photograph? You might think it would be the extremely shy and reclusive three toed Wombat, but you'd be wrong! It is in fact the humble Warthog, in my opinion. Tricky beasts to get close to, they have terrible eyesight and no sense of smell but incredibly acute hearing, they can hear a pin drop over two miles away during a thunderstorm... remarkable. I'll tell you how I go about snapping them. Firstly, approach them downwind, or is it up wind? I can never remember! Anyway crawl on your belly like a snake for several miles until you come within sight of the warthogs, then head for some long grass or a small bush near the hogs where you can hide unheard. Now (and this is the tricky bit) make a sound like the mating call of the female of the species, it's a kind of low pitched squeal. When the male warthogs hear this they'll come towards you like a shot. As soon as they're within around 10 feet of you leap out of the small bush or long grass (with your camera) and press the shutter like billy-o. After about a second the warthogs will realize they've been made a fool of and won't be happy, far from it, they'll start to charge! Now, you could dive back in the small bush or long grass but I wouldn't advise this, much better to just run like hell and pray you don't get speared in the jacksie with their razor sharp tusks.  Second question - What is the most dangerous animal to photograph? You might imagine that the man eating Gorilla was pretty dangerous or the deadly poisonous Algerian Viper was an animal to avoid at all costs, but in my opinion the Pygmy Hippopotamus has to come top on a dangerous animals list. You seem surprised? Don't be! Let me enlighten you as to the true nature of this vicious beast, this fiend in Hippopotamus clothing! You see pygmy hippos are always in a bad mood and when they are in a bad mood they attack anything that moves, they're also just the right height to headbutt you in the goolies when they charge, as I know from painful experience! These 'devils' have viciously pointed razor sharp fangs, I once saw a man have both his arms and legs gnawed off by a pack of pygmy hippos, it wasn't a pretty sight, and I would have come to his aid except I was hiding up a tree screaming for help. Do not go near these animals! The only possible weakness in their armory is a hatred of the scent of lavender. So I would advise you to soak your clothes in lavender oil if you're in Pygmy Hippo country. The only drawback to this strategy is that as soon as they smell you approaching they will disappear, so you can forget about photographing them! But frankly this is a good thing! Getting a good snap is irrelevant! Your goolies are far more important!  Third question - What is the second most dangerous animal to photograph? Without doubt it is the notorious Bolivian tree frog, it would have been my 'first most dangerous animal' but I've never actually photographed it, too scared! I only know it by reputation or infamy. You see the this abominable creature has never been photographed by anyone! Anyone who's tried to do it a has died ...horribly. All I know is what I've heard, apparently when anyone gets within 10 feet of this menace, the frog leaps from the tree it's lurking in and lands on the poor blighters nose, it then secretes a fast acting chemical from it's skin which is absorbed through the skin of the victim instantly immobilizing them. Then (and this is the horrific bit) it crawls over every inch of the person leaving a trail of green slime behind, this slime slowly digests the living tissues so the victim is eaten alive and has to watch powerless as bits of his or her body dissolve and drop off forming a pool of green ooze at their feet. I've heard that these frogs can be tamed and are kept as extremely dangerous pets by the natives. You might think this animal is a myth like the Yeti or the Venezuelan flying pig but you'd be mistaken! Just because no one's actually seen one or photographed one doesn't mean it doesn't exist, I rest my case. 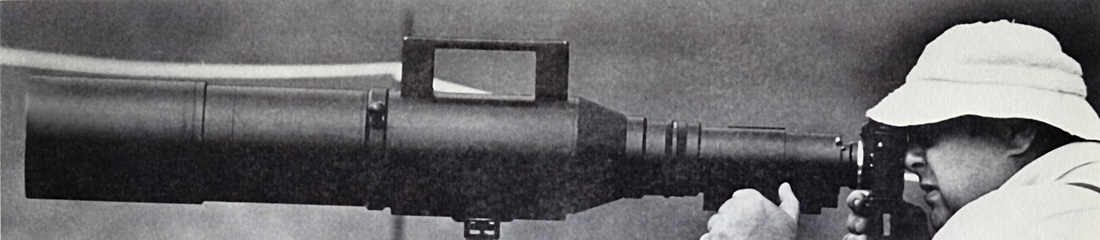 Fourth question - What is your favorite piece of photography gear? Without doubt it's my Vostok 5000 lens, an incredible piece of kit and very long! Why do I need such a big lens you may ask? Firstly it's to impress other photographers - which is essential. Yes, this lens is unwieldy and very heavy, hard to lug about the jungle - or anywhere for that matter - as it weighs several tons. However it's second most important feature is that it's excellent as a makeshift club to fend off angry animals. I made the terrible error of running into a small bush (or was it some long grass?) when being pursued by some charging warthogs and this lens saved my life. The warthogs soon knew who was boss when I swung this large piece of metal around in an aggressive manner, sadly it ruined the lens but you have to make sacrifices for your art.  Fifth and last question - Do you sell your photographs? And can I buy one?
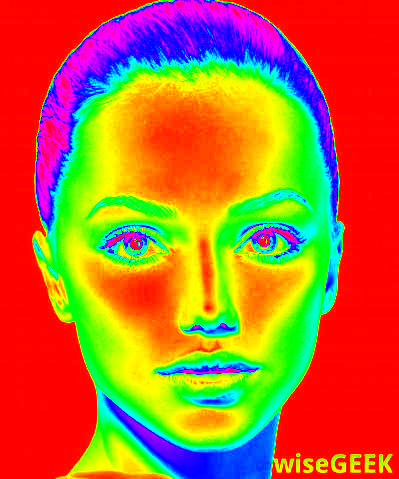
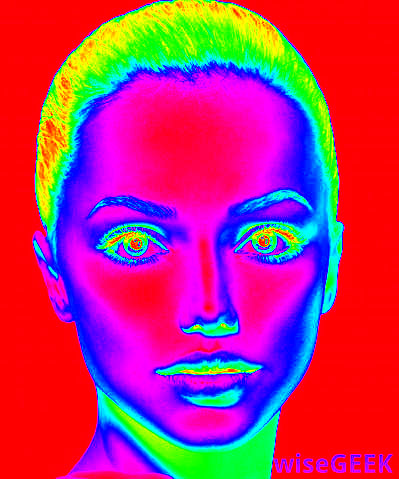
No I don't and no you can't! All my photographs go on display in my 'trophy' room at Thistledown manor, my stately home in Berkshire, where if you're very lucky you will get a guided tour from yours truly. In this tour I will show you my wildlife photographs and will tell you at great length how each photograph was taken. Strangely I don't have many visitors... odd that!?!  Myton students being ultra brainy and technologically sophisticated probably know all about 'clipping masks' in Photoshop. But if you don't and haven't a clue as to what they are then this post is for you or maybe not as it is a bit technical - be warned. Clipping masks are quite clever and allow you to do some complex collaging techniques with photos which if you had to cut and paste in the real world (e.g. with scissors and glue) would take you a long time. The Basics The basic concept is to create a shape layer using the shape tool, then you import a photograph which automatically goes on a separate layer. Make sure the photograph is above the shape layer in the layers panel then right click on the mouse while the photograph layer is highlighted and in the side panel you should see text about halfway down which says 'create clipping mask' when you click on this it effectively cuts out whatever shape you're using from the photograph and the rest of the photograph is effectively invisible but is still there, if that makes sense. In the example above I used a heart shape (Ahhhh!) and filled the background with a coloured gradient fill. If you can't find a shape you like in Photoshop's standard shapes you can always make your own custom shapes and there are tons of free shapes which you can download from the internet and import into Photoshop . Usefully you can resize, move, transform, apply filters etc. to the photograph you're using and the clipping mask will remain 'linked' to the photograph. Adjustment layers Possibly even more usefully you can use clipping masks to link adjustment layers to the layer directly beneath the adjustment layer. So, for example, if you wanted to increase the brightness of just one layer you would create a brightness/contrast adjustment layer above the layer you wanted to increase the brightness of, then click on 'create clipping mask' and only the layer below would be brightened if that makes sense - which it probably doesn't. It's a useful feature. I've put a slide show below of some experiments I did with clipping masks and have included the layers panel with the image so you can (hopefully) see how I constructed the image. Clipping masks are probably most useful as a kind of graphic design tool, e.g. - some of the images below remind me of album covers, but I think they could have artistic applications as well. Clipping masks with text You can also use clipping masks with text layers as the image below illustrates. 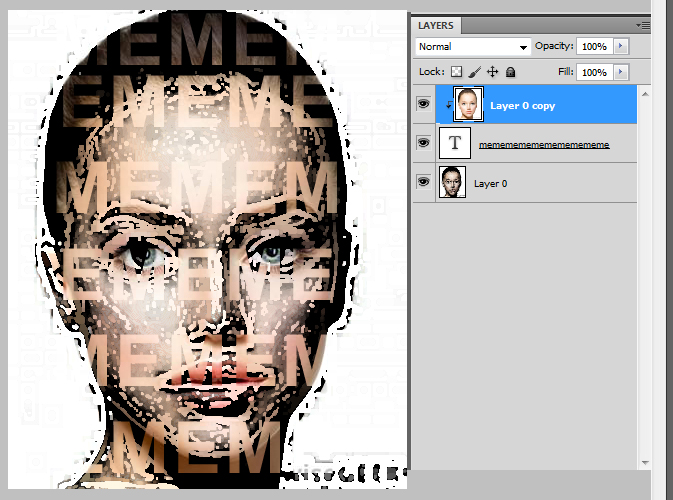  I came across an interesting way of altering the colours in images which can produce some weird and wild results and as I like the weird and wild this appealed to me. Explaining it is a bit more tricky it's probably just easier if I show you some examples. These effects are produced by the Gradient Map adjustment layer which is found in the adjustment layer menu and what it does is apply the colour in a gradient to areas of the image depending on the tonal value. So in the screen shot example below the gradient goes from black to purple to orange to yellow and the highlights (or white areas of the image have been changed to yellow, mid tones orange and dark areas black and purple. So the left side of the gradient corresponds to dark tone and the right light tone. Since you can create your own custom gradients and move the 'colour tabs' in the gradient bar around it gives you a lot of control of where a colour appears in an image, if that makes sense. 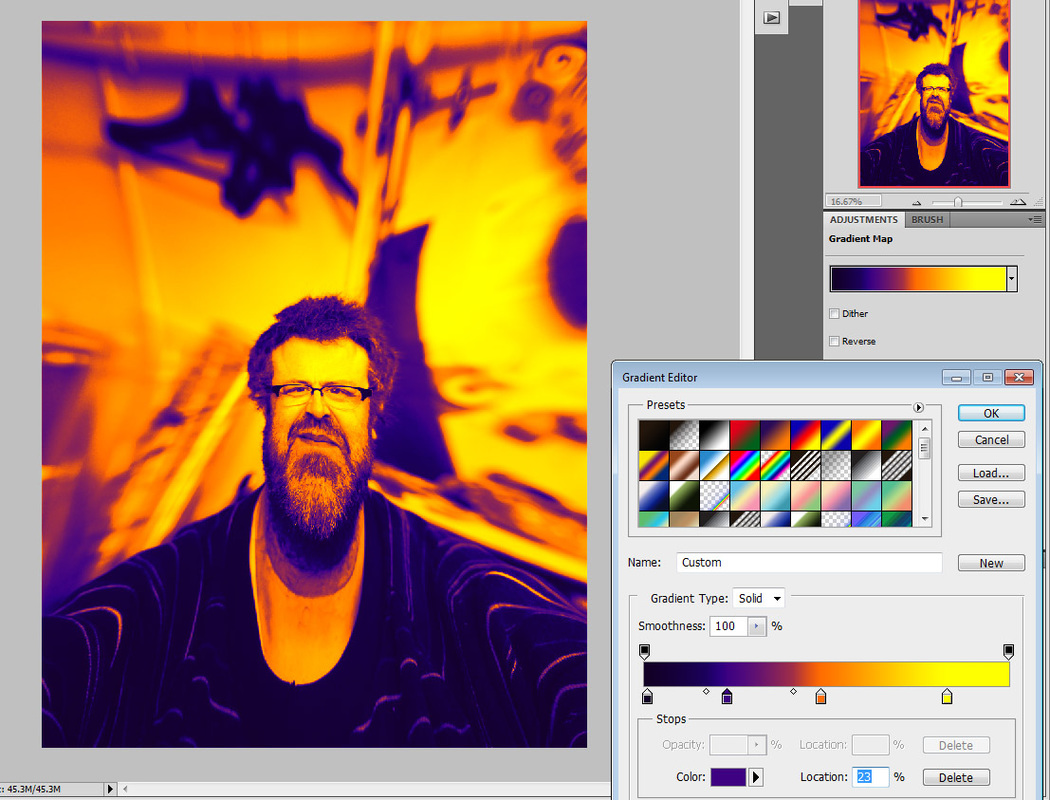  She's a rainbow On the left is another example where I created a more complex gradient where black appears throughout the gradient. I've pasted a couple of images below which use a rainbow gradient, in the second image I reversed the direction of the gradient effect. I imagine you could create some more complex colour combinations by selecting certain areas of the image and applying different gradient maps to those e.g. - the hair or eyes in portraits. You may have noticed some phone apps on smartphones use a 'poor mans' version of these effects.
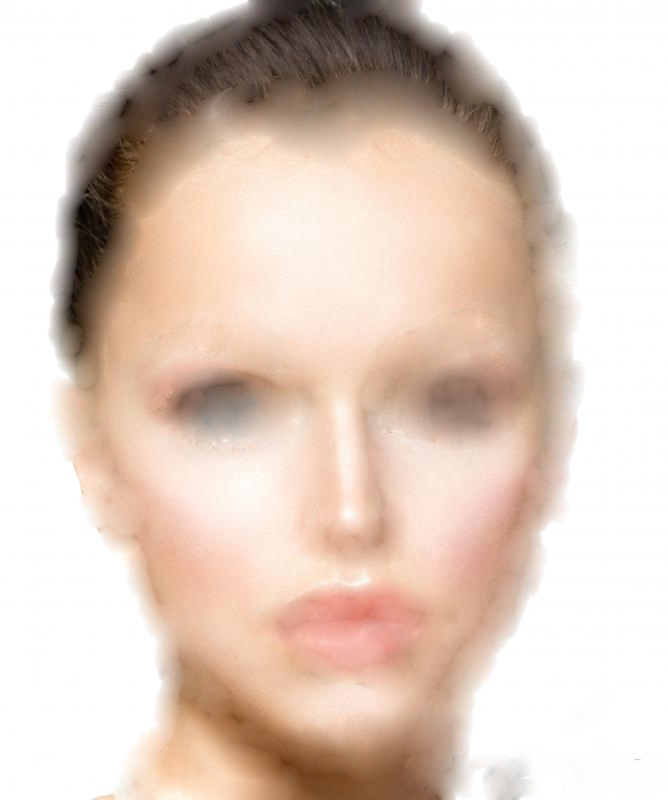
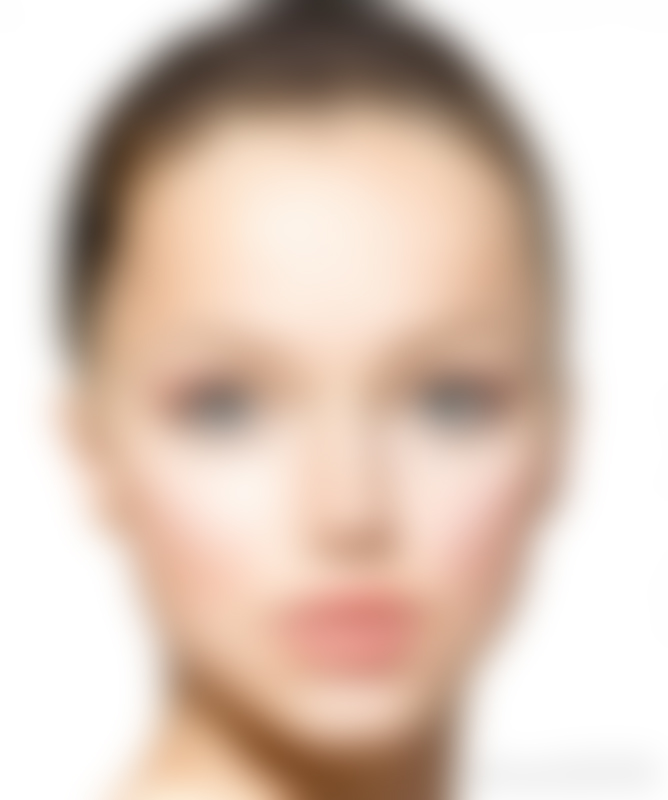
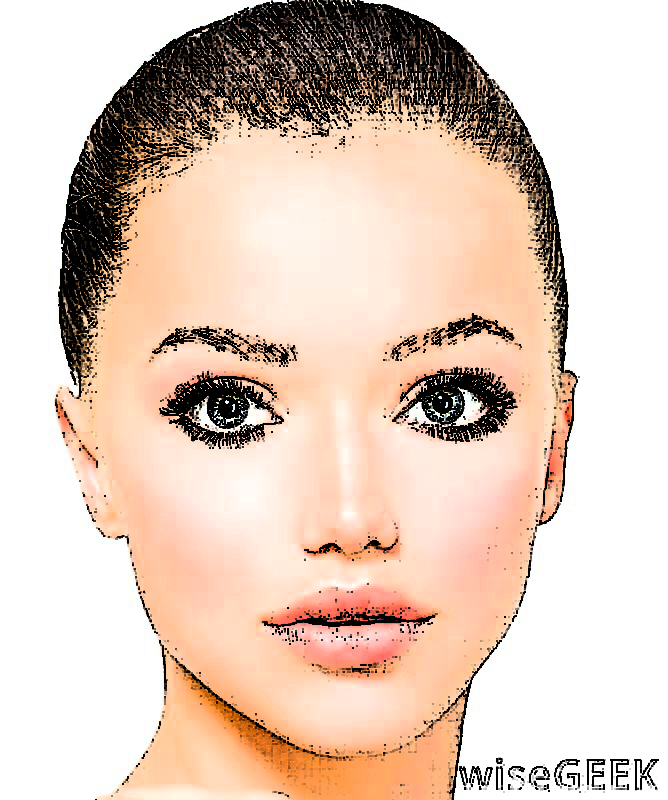
 This post was prompted by seeing Lotte Reiniger featured on a Google Doodle as I believe they're called. You may have seen her animations on TV as I have but I hadn't realised she produced the first feature length animation called The adventures of Prince Achmed in 1926, years before Walt Disney and was a pioneer of animation inventing a silhouette form of stop motion animation partly inspired by Javanese shadow puppets (see pic below).  STOP! ....motion I've put a slide show of stills from her movies and some YouTube videos - highlights from the Prince Achmed film and a video showing her working methods (with a German accented English commentary which I found amusing). There's a strange, slightly mysterious quality to her animations, I much prefer them to a lot of these hugely complex (and expensive) computer generated animated films. And despite the rather simple stop motion technique she uses they're surprisingly subtle and experimental.  You might think that when you've taken your photographs and choosen the best ones and tweaked them a bit to improve them that you're finished, your work is done and you can relax, paint your nails, trim your beard, wax your legs, pluck your moustache, go on Instagram or waste an hour watching GOT. But the creative possibilities are not over yet! There's a lot you can do to a photograph in Photoshop (no kidding! - Blog Editor), it can be a starting point to a creative journey into the mysterious land of Pixeltopia. What am I taking about? Well, you've probably seen from my previous posts that I like 'modifying' photos using filters and other effects/tools. They can change the photograph dramatically and lead to some interesting results. So I thought I'd go through some examples of what filters etc. can do. I used the photograph above as a starting point for all the examples I've put below. It's a rather typical beauty shot and I altered it in a variety of ways using Photoshop to see if I could make it more interesting and unusual. I ought to say that looking more carefully at this image I'm not actually sure it is a photograph as it's had so much smoothing done on it, but never mind it's a good example to use even if it isn't a photograph (what are you on about, are you still taking the pills? - Blog Editor). Blurrrrrrrr........ The first tool I used (in the picture below left) was the healing brush tool (in the tools palette, looks like a plaster) this tool is supposed to remove spots and imperfections in a photograph but can be used creatively to blur the image and remove detail. I quite like the result its a bit like a watercolour painting. The photo below right was done using the Gaussian Blur filter (which you can find in the 'Filter>Blur' drop down menu) which applies an overall blur to the image. Both pictures below have a rather ghostly appearance, however the Gaussian Blur image does funny things to your eyes as you try to focus on something in the image...and fail.
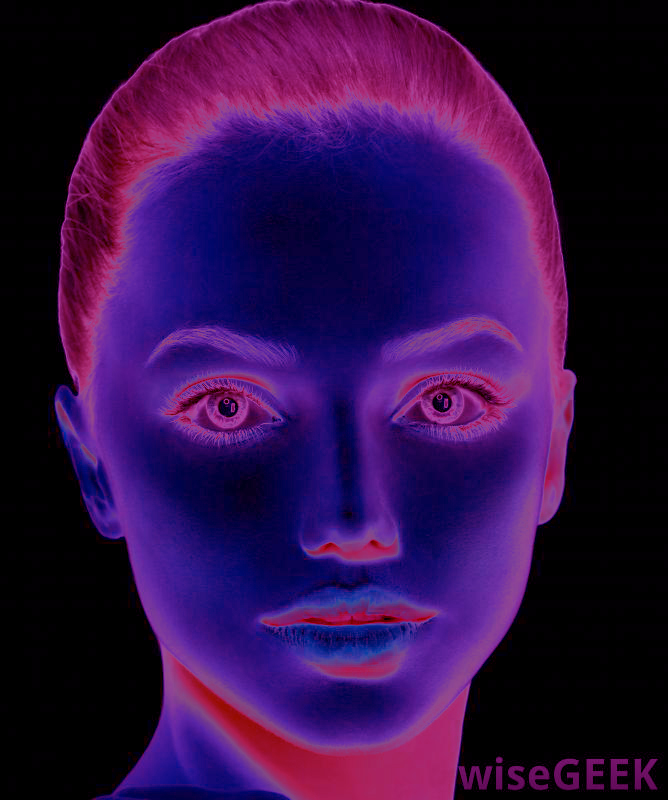
Liquiefy and Solarise I then used the ever popular Liquefy tool in the 'Filter' drop down menu (see picture below left). You may have used this before and it's fun to play with but it's easy to get carried away and go too far, it's probably best used subtly to slightly distort the image in this case I 'manified' the model and could have done a better job if I'd taken more time and made 'his' skin look more rugged etc.. The image below right uses a filter called 'Solarise' - in the 'Filter>Stylise' menu - it's based on a real photographic technique where you expose the film negative to light while it's still developing and it gives a strange combination of negative and positive image qualities combined. I modified the colours in the image as well. It's quite a nice effect and gives a kind of alien quality to the models face.
Patterned glass and Reticulation The image below left uses the Glass filter (found in Filter>Distort) to mimic the effect of photographing someone standing behind a sheet of textured glass. You'd probably be better using a real sheet of textured glass as the effect would be more realistic and subtle but it's a good tool if you want to see what this effect does to your picture. The photo below right has been modified with the Reticulation effect (Find in Filter>Sketch) this is based on and old school photographic technique which is produced by putting a film negative in boiling water which causes the film to crinkle in an interesting way covering the surface in a kind of grainy pattern. I like this effect and it's made the image look far more dark and moody, it's also made the model look like Sinead O'Connor which will mean nothing to anyone born after 1995.
Artistic Filters The next series of images are moving more into the computer generated illustrations arena and away from traditional photography, I would use these with care as the images are almost becoming drawings or paintings. You could try modifying parts of a photograph using them or use the modified images as part of your development showing how you're exploring and experimenting with different ways of developing your photographs. Many of the filters in Photoshop attempt to mimic certain painting and drawing effects, I say attempt because while they do a pretty good job at it there is something artificial in the way they imitate painting and drawing styles - in my opinion. Luckily computers can't draw or paint like human beings, painting and drawing is a very subtle process and in some ways it's the mistakes and what you might call the emotional and intellectual response to things we see that the computer can't fake. Ink outlines and Glowing edges The image on left below is done with the Ink Outlines filter and...err... looks like a drawing with ink outlines and dots. The next image on the right is done with the Glowing Edges filter with all the colour removed, I like the glowing edges effect it's a kind of 'computer style' effect, slightly strange an artificial looking. I've seen this effect used a lot and it's becoming a bit of a cliché.
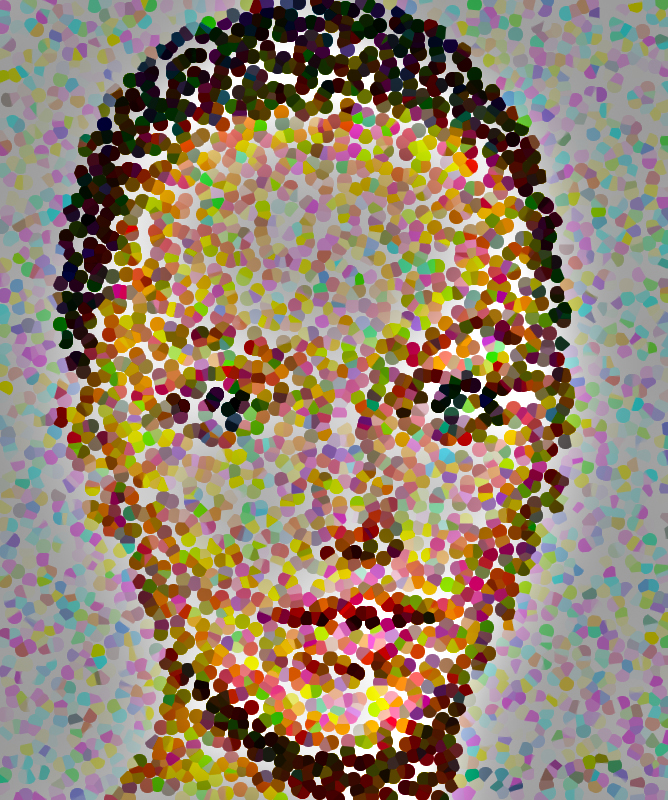
Find edges and Pointillize The image on the left below was first converted to a black and white image and then I used the Find Edges filter which results in a kind of ghostly line drawing. The next image below right used the Pointillize filter which converts the image into coloured dots (imitating the pointillist painting style). I then applied something called HDR toning which changed the tone in certain areas and gave the image more varied depth.
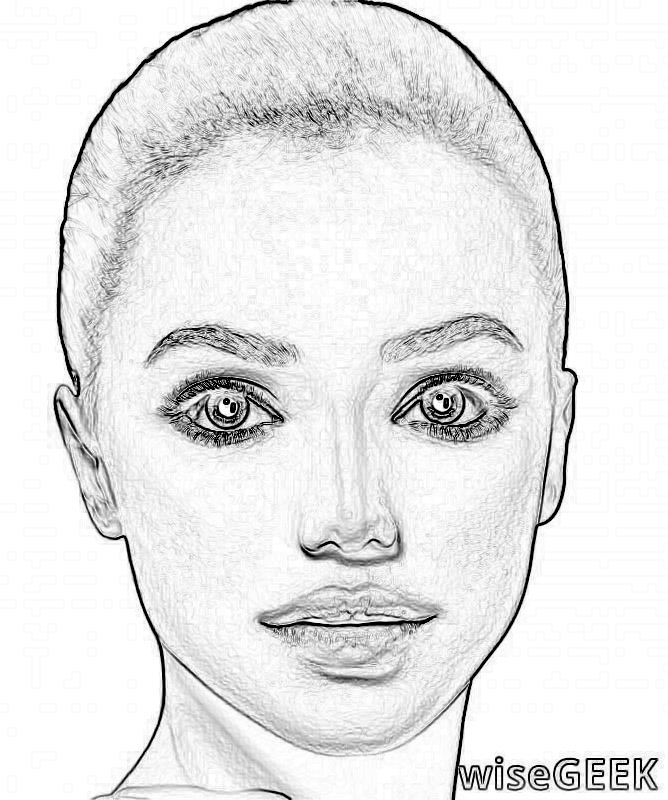
Find edges again and diffuse The first image below left used the Find Edges filter - like the one directely above - but I used slightly different settings so it had less detail and just showed the pupils of the eyes it also produce a weird pattern in the background which is odd since the background in original photo is basically white. I also applied the Diffuse filter to soften the the lines which were rather hard edged. The next image below right used the Diffuse filter again and this has the effect of removing some details and softening the harder lines which makes the photo look even more like a painted illustration.
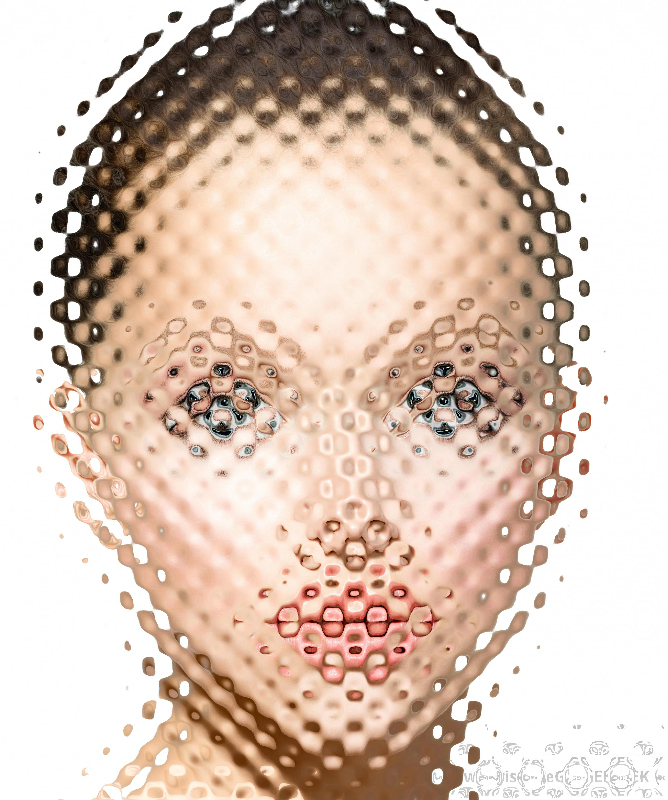
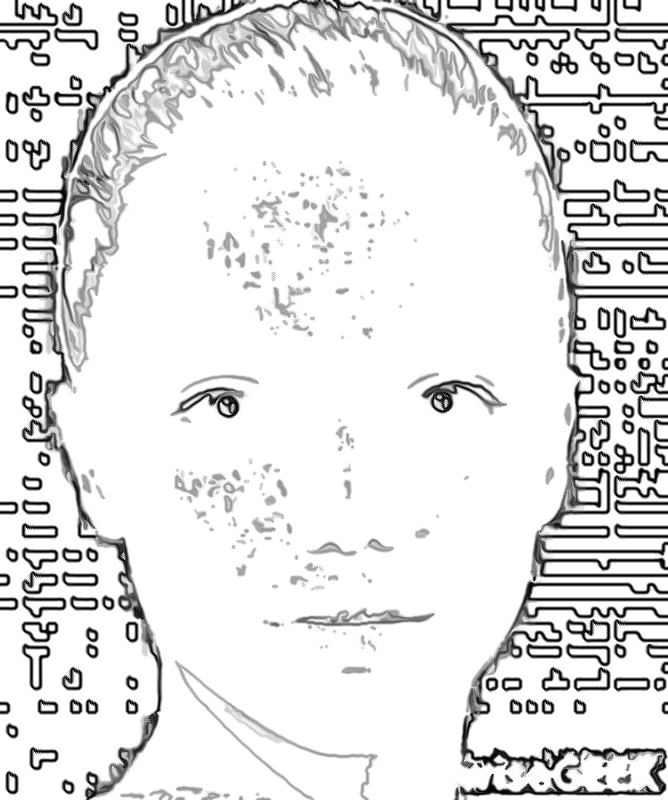
And finally......... The image below I've made bigger so you can see the details better. It was done by applying the Colour Half Tone filter and then using the Glowing Edges filter. The half tone filter converts the image into small half tone dots and then the glowing edges filter draws circles around those dots and turns everything else black. I like this image, it's a kind of ghostly cyber portrait, however it's moved a long way from a photograph and would probably be labelled as a computer generated image/painting. It's often good to use a series of filters one after the other as this can build up a more unusual/interesting image than you'd get if you just used one filter. With many of the filters you can tweak the settings using sliders and this can change the appearance of the image dramatically. This has been a longish post and I hope it's been of some interest to you, I would urge you to play around with some of the filters, the final images may not be useable but you'll be finding out more about the creative possibilities of Photoshop and it may lead to some different ways of thinking about photography. 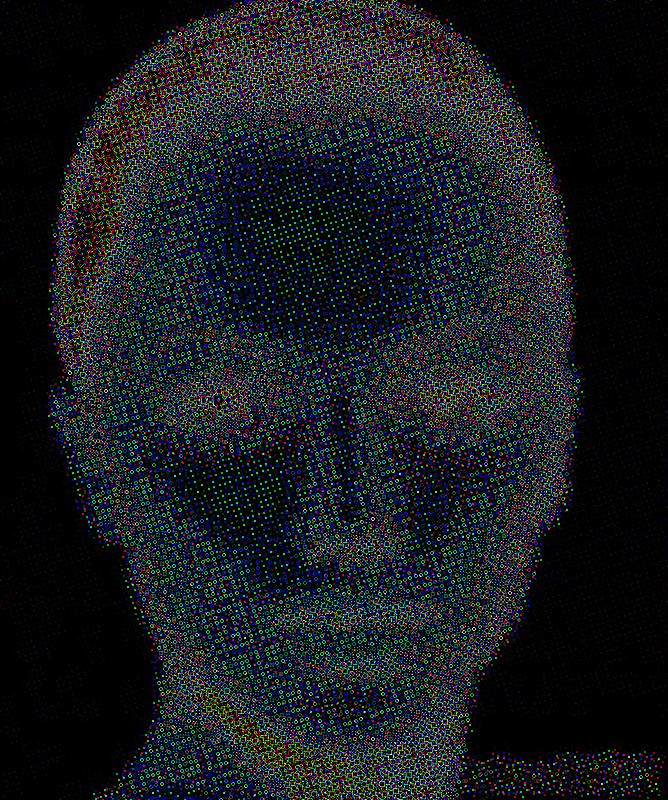 |


 RSS Feed